
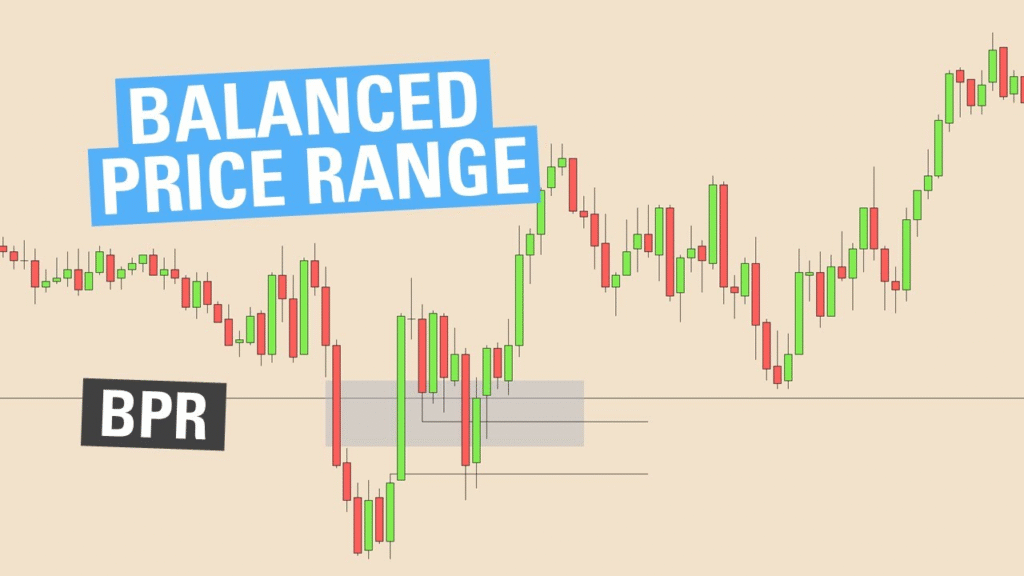
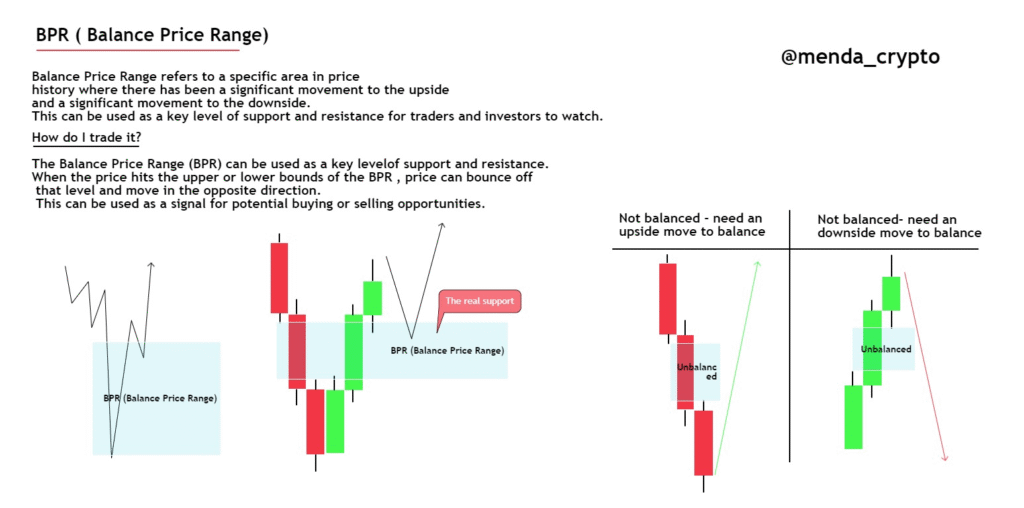
BPR stands for Balanced Price Range.
It is a concept taught by Michael J. Huddleston (ICT) to identify areas where price was previously balanced but then became imbalanced.
This range later acts as a magnet for price or becomes a strong support/resistance zone when revisited.
In simple terms:
BPR is the range between two equal highs or equal lows that have been broken, and price returns to this zone for a reaction.
1. Understanding the Logic Behind ICT BPR
Institutions create balanced zones before large moves.
Think of it like this:
- Price consolidates (balance)
- A breakout happens (imbalance)
- Later, price often returns to this zone (rebalancing)
- This gives you a high-probability entry
It’s a smart way to trade pullbacks into institutional zones with low risk and high reward.
2. Structure of a BPR in ICT
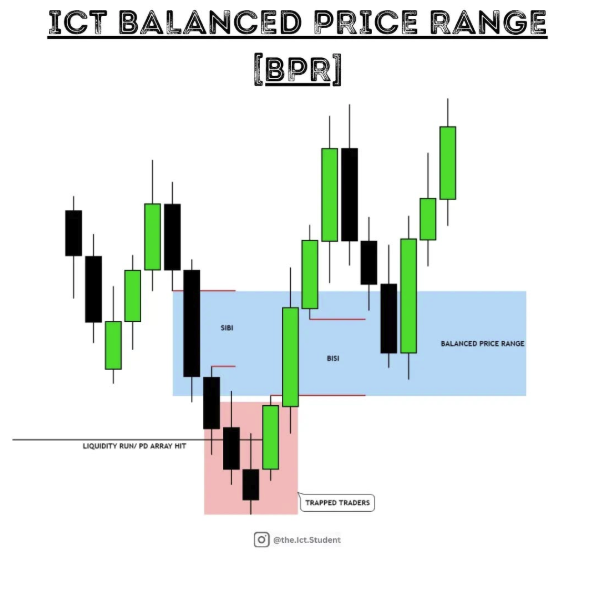
A Balanced Price Range has 3 key parts:
- Equal Highs (or Lows)
→ These are liquidity pools - Break of Structure
→ Market runs the liquidity above the highs or below the lows - Return to the Balanced Range
→ Price comes back and reacts from that zone
3. Bullish ICT Balanced Price Range Example
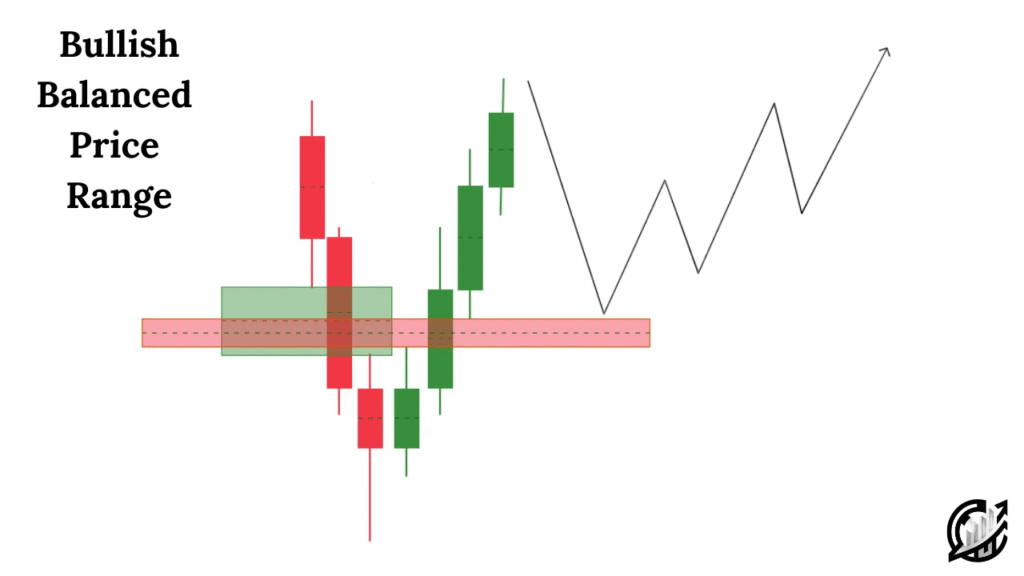
Let’s say you’re looking at EUR/USD on the 1-hour chart.
- Price forms equal highs at 1.0950
- Then price breaks above 1.0950 and creates a new high at 1.0970
- Later, price retraces back into the 1.0950–1.0930 zone (BPR range)
This range between the two previous swing highs is your bullish BPR.
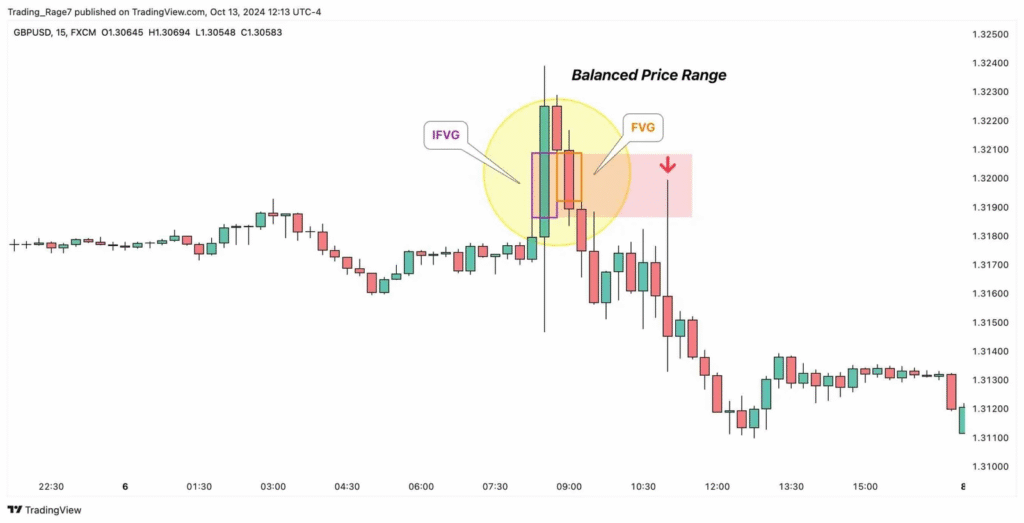
When price comes back into this zone, you watch for:
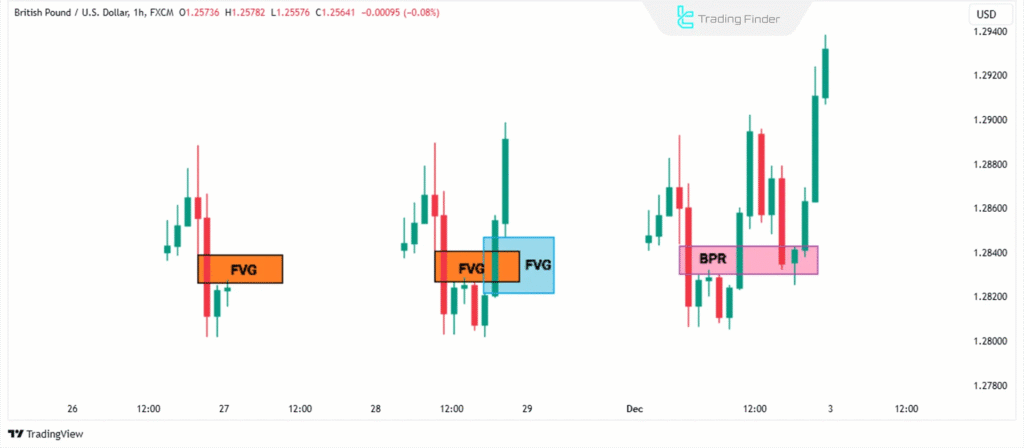
- Fair Value Gaps (FVGs)
- Order Blocks
- Change of Character (CHoCH) on lower timeframe
→ That gives you a precise entry point with Smart Money confirmation.
4. Bearish ICT Balanced Price Range Example
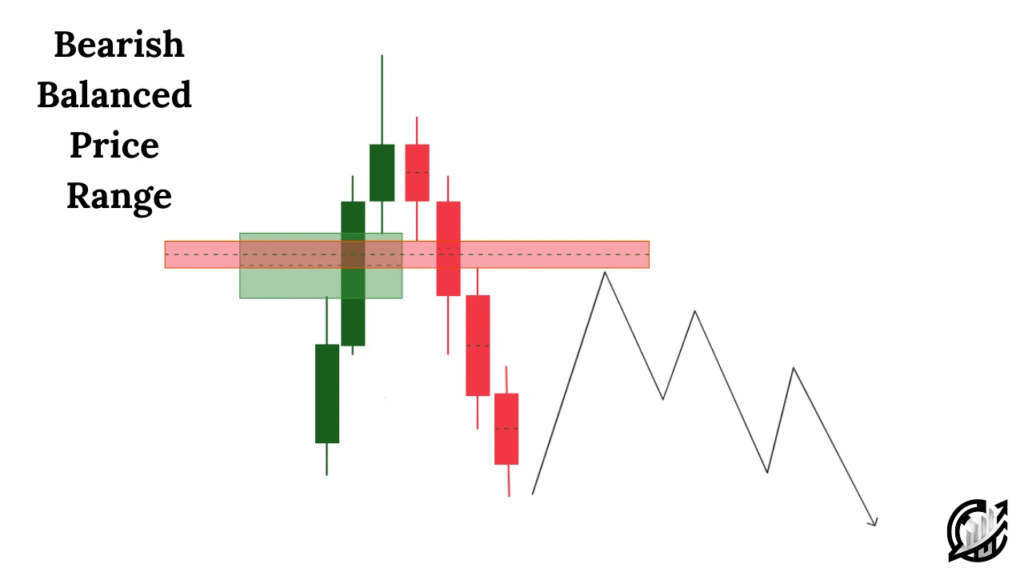
Now take GBP/USD on a 15-minute chart.
- Price forms equal lows at 1.2700
- Price breaks below and hits 1.2680
- Then it returns to the 1.2700–1.2715 range
This zone now acts as a bearish BPR.
When price enters it again, look for:
- Liquidity sweeps
- Displacement to downside
- A short entry from the rejection
5. Why ICT BPR Works
Smart Money often uses these zones to:
- Trap retail traders at breakouts
- Rebalance orders left in the previous consolidation
- Create inducement for new traders before moving in the real direction
That’s why price often reacts very cleanly from BPR zones.
6. Tips to Trade BPR Effectively
- Use higher timeframes (H1, H4, Daily) to spot clean BPR zones
- Drop down to lower timeframes (M5, M15) for confirmation entries
- Combine BPR with:
- FVGs
- Order Blocks (OBs)
- Mitigation Blocks
- CHoCH or BOS
7. Common Mistakes to Avoid trading Balanced Price Range in ICT
- Don’t confuse equal highs/lows with just any two candles
→ Look for clear liquidity pools formed over time - Always wait for confirmation
→ Never enter a trade just because price touched a BPR - Avoid using BPRs formed during low-volume sessions (like Asia) unless they align with higher timeframe structure
8. Final Example: How to Combine ICT BPR with a Full Setup
- H1 shows equal highs → BPR zone formed
- Price breaks above those highs
- Price retraces back to the BPR
- On M5, price hits a FVG inside the BPR
- CHoCH confirms the shift in structure
- You enter with stop loss below FVG and target next liquidity
→ This kind of setup can give a 1:3 to 1:5 R:R trade easily.
9. Final Thoughts
ICT’s Balanced Price Range (BPR) is a powerful concept that helps you trade institutional pullbacks with confidence.
It gives you:
- Clarity on where price may return
- An edge in identifying low-risk, high-reward trades
- A structured way to understand price behavior
Keep backtesting BPR setups on your charts, and you’ll start seeing how often price respects these zones.
Would you like a diagram showing bullish and bearish BPR examples visually? I can create that for you.
Leave a Reply